A tough opening shot with out of bounds to the right and red stakes all down the left. Playing down the left is the best option leaving a straightforward shot to the green. Be careful of the bunker down the right as this is tough to see from the tee, too far to the right hand side and there is a good chance your approach shot is blocked by the large tree hanging over the fairway.
Hole 2
The safe players will want to stick to the fairway with the ideal shot stopping at the dog leg leaving a 100 yard approach, make sure you take enough club for your 2nd shot as the green is protected on the short side by a bunker. The more aggressive player will cut off the dog leg which takes the green side bunker out of play but narrows the green making the approach slightly tougher.
Hole 3
This is our signature hole and as tough a par 4 as your likely to find. Staying right off the tee is a must, with the severely sloping right to left fairway, longer hitters will have the second pond to deal with. On your approach to the green you have lakes on your right and a bunker just short of the raised green with out of bounds just over the back, picking the right club is vital here. Par is a great score.
Hole 4
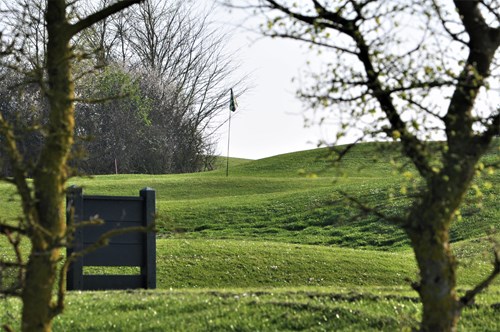
Often plays longer than it looks, this tricky par 3 green is heavily guarded by bunkers round both sides. You don't want to go past the pin as the putt down the sloped green breaks quicker than you might think.
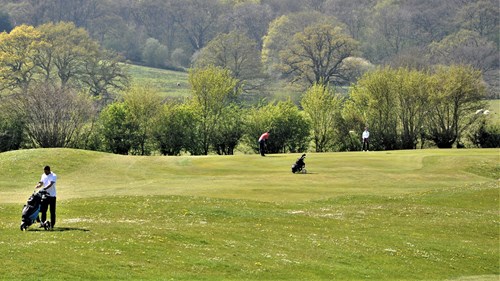
Hole 5
The second shot is most important here with lots of room off the tee, your approach must be accurate as the green slopes from left to right and is guarded by bunkers to the left and right.
Hole 6
A fairly short par 5 and a good birdie chance. Playing down the left makes the hole longer but opens up the green for an easier second shot approach. Play down the right and the hole is made shorter but your second will need to be long and high to carry the bunker short of this green. The sensible shot here is a lay-up short of the left side bunker which opens the green for a short chip shot in.
Hole 7
Hitting the tee shot down the right is the only option here with the fairway heavily sloping the left. The second shot is a challenging one to this raised green as there is more distance to carry than you might think and anything left of the green is going to roll down the bank.
Hole 8
The longest par 3 on the course demands an accurate tee shot to open up a birdie opportunity. Often plays longer with the raised green.
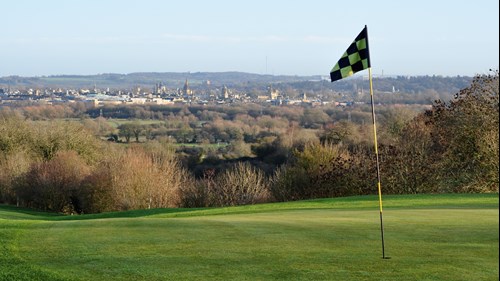
Hole 9
Hit the right side of the fairway to leave yourself a good line in to this tricky dog leg left par 4. A large tree blocks the line down the left. After the ditch you can use the right to left sloping fairway to guide the ball towards the green. Be careful not to play to the eighteenth, from a distance its the only visible green.
Hole 10
The last par 3 and perhaps the most difficult. Pin position is key as you don't want to be on the wrong tier leaving a very tricky 2 putt for par. Plays uphill so may need one more club than you think. Par on all three par 3's is rare.
Hole 11
Often playing into wind this can be a very long par 5. Don't expect to be playing your second shot to the green as even the longest of hitters will struggle to get within 20 yards. Get into a good position for for your third shot but be careful of the fairway bunker and the 2 bunkers guarding the left of the green.
Hole 12
Getting too close to this green can make the second shot more difficult so choose wisely off the tee. Can play very easy but can also ruin a good scorecard with the green well guarded by 3 bunkers and out of bounds long and left.
Hole 13
A slight dog leg right with out of bounds all down the left. Aim your tee shot straight at the hole as the fairway opens up and anything just right of the fairway should kick back down the slope. Think carefully about your yardage left as you will almost certainly need 1 more than you think and into the wind will likely need 2 more.
Hole 14
This dog leg left is a risk and reward hole, a long drive and you can cut the corner leaving a fairly short pitch into a long, narrow and very heavily guarded green. The clever choice is to play for par down the right of the fairway and laying up just short for the up and down chance. Accuracy is paramount with a bunker short left and pin high right of the green, with out of bounds only a few yards left and long from this dome shaped green.
Hole 15
Out of bounds to the left. Keep your drive down the right of the fairway to give yourself a chance of going for it in 2. Should you decide to go for it you will need hit the perfect line as the out of bounds cuts in and the green side bunker to the right leaves a narrow opening to the green. Keep the ball in play and this is a good birdie chance.
Hole 16
Play down the left of the fairway and avoid the two bunkers and you are rewarded with a fairly straight shot into this dog leg right hole. Don't go long as it leaves a tricky chip down the green.
Hole 17
An almost ninety degree dog leg right with a very well placed tree on the bend. Make sure you are past it or well short for your approach shot into the green, Watch out for the bunker green side short and right.
Hole 18
Accuracy is the key here with a bunker on the right and water to the left. A good drive will give you a chance to reach in two, don't be fooled though the hole looks closer than it is. Get past the ditch and any approach down the right side should roll left towards the green.
01 Jan to 14 Jan 8.00-5.00
15 Jan to 04 Feb 7.30-5.30
05 Feb to 30 Mar 7.00-6.00
31 Mar to 24 Sep 7.00-8.00
25 Sep to 06 Oct 7.30-7.30
07 Oct to 27 Oct 7.30-7.00
28 Oct to 17 Nov 7.30-5.30
18 Nov to 08 Dec 7.30-5.00
09 Dec to 31 Dec 8.00-5.00 (Closed on 25 Dec)